Hacking your Framework Laptop’s EC for fun and profit
In this post, I’ll walk through adding a simple but highly-requested feature to the EC: a Fn lock light. It’s mostly fun, there’s no profit.
This post is part of a series on the Framework Laptop’s embedded controller; see previous posts here.
This blog post was written for the 11th Generation Intel® Core Framework Laptop, codenamed
hx20. If you are following this guide and want to deploy to a 12th Generation Intel® Core device, everywhere you seehx20replace it withhx30.DO NOT deploy an
hx20EC firmware to thehx30.
Step 1: Plan it⌗
What do you want most out of your laptop?
If you’re anything like the Framework Community, what you want is a light indicating that Fn is locked. You might be like the Framework Community, judging by that being the target demographic for this post.
There’s a problem though! There aren’t any LEDs on the keyboard that are free to use. Except, perhaps, that one light that nobody really cares about: Caps Lock.
Let’s call that our plan: Stomp Caps Lock and replace it with a Fn lock light!
Step 2: Get set up⌗
You’ll need a couple things to get started:
- A clone of the
FrameworkComputer/EmbeddedController
repository; I chose to clone mine in a
directory named
ec.git clone https://github.com/FrameworkComputer/EmbeddedController ec
- An ARM cross-compiler and some build tools and libraries for your host. I’m a Debian user, so I’m going to give you
the Debian (and probably Ubuntu) instructions. Your mileage may vary. Consult a doctor before taking
apt.apt install build-essential libftdi1-dev gcc-arm-none-eabi
WARNING
Before continuing, make sure that you are using GCC version 10 or below.
To determine which version of GCC you are using, run
arm-none-eabi-gcc --version.If you are using GCC 11 or higher, DO NOT PROCEED. Doing so will result in a computer that no longer boots.
See the open GitHub issue for more information.
Step 3: Write the code⌗
Alright, so we’re going to replace the Caps Lock light. How the heck do we do that?
I like to start by searching. grep1 is a great way to find your way around a codebase! I have a little bit of
background knowledge that affords me a couple hints about how to kick it off:
- The Framework Laptop is referred to as
hx20in the EC source code, and all thehx20-specific code lives in its own folder,board/hx20 - Software engineers either give things very obvious names, or give them obscure and useless names like
batman(). I’ll assume the first.
So, let’s search for caps.
rg -i caps # or grep caps . -ri
keyboard_customization.c
129:#ifdef CONFIG_CAPSLED_SUPPORT
133:#define CAPS_LED BIT(2)
That’s promising! It looks like there’s a block of code in keyboard_customization.c that is controlled by a flag,
CONFIG_CAPSLED_SUPPORT.
Since we’re totally getting rid of the Caps Lock light, this is great. It seems like we can tell the existing code to never touch the LED so we can take it over.
We’ll start there.
The ChromeOS EC build system is configured by “chips” and “boards.” Ignoring chips for a moment, boards have ultimate
control over what the final image does and what it contains. Almost all board configuration is done through a file
called board.h, and the hx20 board is no different.
Looking into board.h, we see that same define: CONFIG_CAPSLED_SUPPORT. Cool. Let’s turn it off.
/* Leds configuration */
#define CONFIG_LED_COMMON
#define CONFIG_CMD_LEDTEST
#define CONFIG_LED_PWM_COUNT 3
#define CONFIG_LED_PWM_TASK_DISABLED
#define CONFIG_CAPSLED_SUPPORT // <== delete this line!
If you were to stop now and go on to step 4, you wouldn’t have a Caps Lock light. However, we’re not quite done!
How do we hook it up to the Fn lock feature? The secret lies in the same file, keyboard_customization.c.
ASIDE: Boards in the ChromeOS EC codebase can “override” common parts of the firmware.
As an example, there is a shared implementation of an i8042 keyboard in
common/keyboard_8042.c. It implements matrix scanning, reporting keyscans via the standard keyboard I/O ports, and more. If that’s all a board needs, it’s perfect: drop it in and go.The
hx20board extends that shared implementation with a bunch of code inkeyboard_customization.cin part by implementingkeyboard_scancode_callback(line 459) to handle additional keys like the Fn key, the Framework key and others.
Looking around a little more in keyboard_customization.c, we’ll see a suspicious definition for FN_LOCKED:
#ifdef CONFIG_KEYBOARD_CUSTOMIZATION_COMBINATION_KEY
#define FN_PRESSED BIT(0)
#define FN_LOCKED BIT(1)
Following that lead, we’ll quickly find a few other functions that deal with locking and unlocking Fn:
fnkey_shutdownandfnkey_startup. These are a good landmark! They deal with making sure Fn lock survives after the computer is shut down.functional_hotkeychecks forSCANCODE_ESCand uses that to change the value ofFn_keyto include or excludeFN_LOCKED. Bingo.
Alright, here’s our game plan. It looks like all of those functions use Fn_key, and they store or retrieve the flag
value FN_LOCKED. Let’s add our own function that updates the LED based on FN_LOCKED.
We can steal lovingly copy the LED handling code from the Caps Lock code that we disabled earlier:
void hx20_8042_led_control(int data)
{
	if (data & CAPS_LED) {
		caps_led_status = 1;
		gpio_set_level(GPIO_CAP_LED_L, 1);
	} else {
		caps_led_status = 0;
		gpio_set_level(GPIO_CAP_LED_L, 0);
	}
}
Here we go! I decided to put the new code right above fnkey_shutdown, since it’s all related.
static uint8_t keep_fn_key_functional;

static void hx20_update_fnkey_led(void) {
	// Update the CAP_LED_L GPIO to On if Fn_key contains FN_LOCKED, Off otherwise
	gpio_set_level(GPIO_CAP_LED_L, (Fn_key & FN_LOCKED) ? 1 : 0);
}

void fnkey_shutdown(void) {
	uint8_t current_kb = 0;
At this point, nothing new is going to happen. You just added the code, and you didn’t hook it up anywhere! We’ll do that next.
Let’s install some hooks.
ASIDE: Hooks are the ChromeOS EC’s way of coordinating code that needs to run after certain events. They’re used all over the EC firmware!
Some useful hooks include
AC_CHANGE(which triggers events when the AC adapter is plugged in or unplugged),LID_CHANGE(which triggers events when the lid is opened or closed) andCHIPSET_RESUME(for when the system is coming out of sleep or power-off.)
The hooks we’ll need are CHIPSET_RESUME and CHIPSET_SUSPEND. According to the documentation, “resume” fires when the
system is resuming from suspend or it’s booting and the power is OK; “suspend”, on the other hand, fires when the
system is going to sleep or shutting down.
You might be wondering why we’re not using the existing fnkey_startup and fnkey_shutdown functions! Those are
registered as CHIPSET_STARTUP and CHIPSET_SHUTDOWN hooks, which happen too early and too late respectively. Chipset
startup happens only once, when the board is first turning on but before all the voltage rails are on; shutdown, on the
other hand, only happens when the machine is about to be turned off. Waiting until shutdown to turn off the LED would
result in it remaining on during sleep mode!
Here’s the resume hook we’ll be adding. It will restore the Fn lock LED to the current state of FN_LOCKED:
void hx20_fnkey_resume(void) {
	hx20_update_fnkey_led();
}
DECLARE_HOOK(HOOK_CHIPSET_RESUME, hx20_fnkey_resume, HOOK_PRIO_DEFAULT);

void fnkey_shutdown(void) {
Without line 256 above, this would just be another function. DECLARE_HOOK makes short work of that by registering it
in a giant table of hooks that another part of the code2 handles.
Rinse and repeat for the suspend hook! This one will be a little different, since we always want to turn the light off during suspend. Otherwise, it would stay on after the computer goes to sleep… and that would be strange.
void hx20_fnkey_suspend(void) {
	// Turn out the lights!
	gpio_set_level(GPIO_CAP_LED_L, 0);
}
DECLARE_HOOK(HOOK_CHIPSET_SUSPEND, hx20_fnkey_suspend, HOOK_PRIO_DEFAULT);

void hx20_fnkey_resume(void) {
Finally, we need to go to functional_hotkey where all the magic happens. Let’s put another line right under the code
that turns FN_LOCKED on and off.
	case SCANCODE_ESC: /* TODO: FUNCTION_LOCK */
		if (Fn_key & FN_LOCKED)
			Fn_key &= ~FN_LOCKED;
		else
			Fn_key |= FN_LOCKED;
		hx20_update_fnkey_led();
That should be it! Let’s get it building…
Step 4: Build it⌗
This part is easy if you’ve installed the tools in step 2. Just run make… with some arguments to tell it
what we’re building.
make BOARD=hx20 CROSS_COMPILE=arm-none-eabi- -j
  CC      RO/board/hx20/battery.o
  ...
  BUILDCC util/export_taskinfo_rw.o
  CC      RW/board/hx20/battery.o
  ...
  MV      ec.bin
  *** 61860 bytes in flash and 37996 bytes in RAM still available on hx20 RO ****
  *** 62252 bytes in flash and 37996 bytes in RAM still available on hx20 RW ****
We’re including
CROSS_COMPILE=arm-none-eabi-to tell the build system how to find the ARM compiler. Without it, it would probably try to build the EC firmware using the system compiler. This would be a disastrous outcome. Nothing would break irreperably except perhaps your spirit.
After that’s done (it should take no time at all3), verify that you got an EC image:
ls -l build/hx20/ec.bin
-rwxrwxrwx 1 dustin dustin 524288 Apr 17 17:55 build/hx20/ec.bin
Yes!
Step 5: Flash it⌗
To flash our new EC firmware, We’re going to use ectool.efi. It’s the
safest4 way currently available to flash the EC without digging out a programmer and figuring out how to connect
to JECDB.
Download the latest ECTool release archive. It’s designed to be extracted to a flash drive and booted directly, so we’re going to do that:
mkfs.vfat -F 32 /dev/sdμ1 # Only if you don't have a FAT32-formatted flash drive
mount /dev/sdμ1 /mnt/usb
cd /mnt/usb
unzip ~/Downloads/ECTool-x64-af7a2f3.zip
Archive:  /home/dustin/Downloads/ECTool-x64-af7a2f3.zip
  inflating: README.txt
   creating: EFI/
   creating: EFI/Boot/
  inflating: EFI/Boot/bootx64.efi
  inflating: ECTool.efi
Copy the newly-built EC firmware from step 4 to the root of the flash drive:
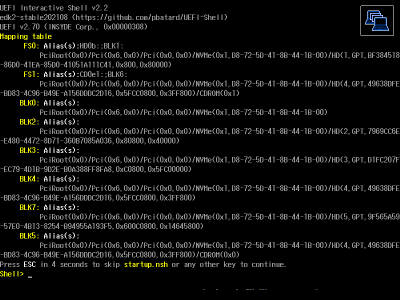
cp build/hx20/ec.bin /mnt/usbReboot. Make sure Secure Boot is disabled. You should find yourself in a dark place.

If you don’t, reboot and press F12 to get at the boot device menu and select your flash drive.
Once you’re at a shell prompt, test ectool:
ectool version
Now, back up your EC flash in its entirety. You can always get a pristine copy from Framework Computer, but it won’t have your serial numbers or date of manufacture or anything. That’s pretty important stuff!
This part is hotly debated by scholars, since if you find that you’ve messed up you’re still going to have to dig out that
JECDBconnector.
ectool flashread 0 524288 fs0:\ec-backup.bin
Dumped 524288 bytes to fs0:\ec-backup.bin
If you’re feeling squeamish, you might want to stop here. There’s no going back once you start.
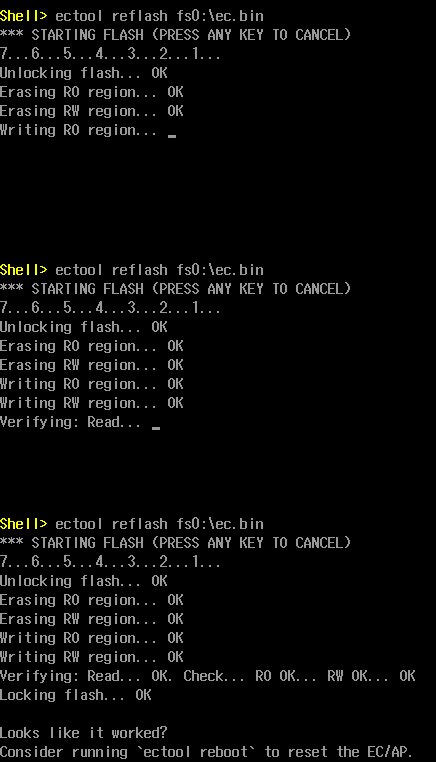
Take a deep breath, grab some coffee or whatever, and start the flash. It’ll take about two minutes, during which you are free to question every decision that got you to this point.
ectool reflash fs0:\ec.bin
If you get an error after the Erasing stage, DO NOT power off your computer. You can try to reflash your backup with ectool reflash fs0:\ec-backup.bin, and if that fails it will probably work until you power it off. You can exit the EFI shell with
exit and your original boot order will resume.
If everything went to plan, ectool reboot and go on to step 6.
Step 6: Test it⌗
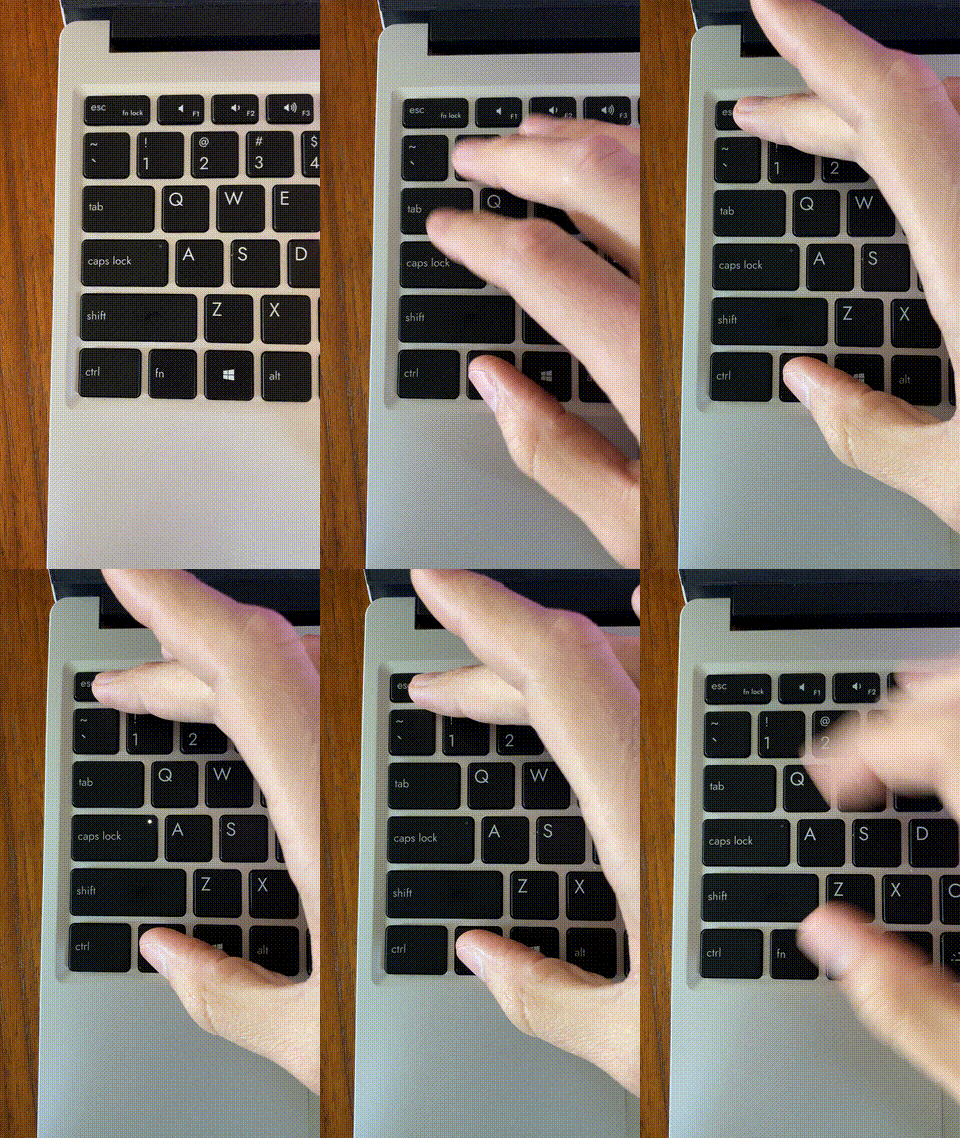
Boot it up and press that button!

Step 7: What’s next?⌗
Now that your Caps Lock light is busted, you might be interested in replacing that whole key with something else… That’s your bonus assignment5!
-
common/hooks.c ↩︎
-
If you’re using WSL2, remember that
/mntis much slower than the rest of the filesystem. Your build times will be much longer in there. ↩︎ -
do not try this at home, it is not safe, etc. No warranty, expressed or implied, yadda yadda. ↩︎
-
My take on this assignment is here. I replaced Caps Lock with Esc (when tapped) and Ctrl (when held). ↩︎